
Your Cart is Empty
Free Shipping On All Orders In July - No Coupon Code Necessary
Free Shipping On All Orders In July - No Coupon Code Necessary
Free Shipping On All Orders In July - No Coupon Code Necessary
Free Shipping On All Orders In July - No Coupon Code Necessary

February 06, 2017 3 min read
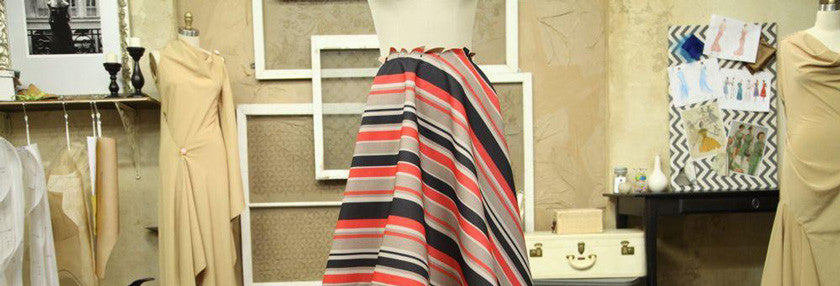
Whether you are a fashion designer, or you are just on your way to becoming one, you probably know about the technique known as draping. It is a common technique used by fashion designers when designing and sewing garments. As you probably know, it generally involves draping fabric around a dress formand pinning it into your desired shape.
However, in case you are now learning the basics of fashion designing, you may need to learn how to drape fabric on the dress form.So here we show you seven simple steps that teach you how to do it.
The first thing you need to do is make sure you get the accurate measurements. Mark the center line of your dress formwith tape. By doing this, you’ll be able to drape even across the body. Do you already have an idea of the lines of your garment? Well, in this case, you can add those lines with tape, as well, to help keep your draping on track.
Prior to start using the dress form, it is needed that you already have a design idea in mind. To be able to handle the fabric, you should have a sketch or a reference photo, especially if you’re a less experienced fashion designer. However, if you’re more experienced, you can also play with the fabric and watch its behavior to get a basis of your design.
You don’t want to waste good fabric, so you’re recommended to start with fitting muslin. However, you should remember that different types and weights of fabric have different ways to behave when draped. Hence, you should choose a muslin weight that resembles the weight of the fabric that you want to use for your garments.
Unless you’re working with a very sturdy fabric, you may be needed to use a foundation piece of some sort, to support the weight of your chosen fabric. In case you use sheer as your main fabric, make sure you choose a fabric that’s close to your skin tone, or one that matches the main fabric’s tone, to avoid the foundation fabric from being seen when you wear the garment.
You should fit the foundation piece to the dress form.If you already have an idea of the design details that you want to add to your garment, then you should make sure that the foundation piece reflects your idea. This could include details such as the neckline or the sleeves.
First of all, it is essential to have enough fabric to cover the area. Remember that it is always possible to cut the extra off later. Usually, draping should be done in sections, such as: front bodice, back bodice, front skirt and back skirt. Begin from the spot where the folds are most predominant. This is the point where your photo or sketch becomes handy. Remember that you need a lot of patience for this step. Use chalk to mark any additional darts or seam lines.
We suppose you have finished the pinning, and you’re satisfied with the draping. Now you need to use a contrasting color thread to seam the fabric to the foundation piece. In case you’re not using a foundation piece, you’ll seam the fabric to itself. You need to go slowly with this step, to avoid missing any folds during this process. This allows you to remove the pins without undoing your work.
Make sure that the raw edges of your draping are hidden in the seams. It is now the right time to remove your basting stitches.
Final thoughts
As you can see, it is easy to drape fabric on your dress form. All you need is to follow these seven simple steps, pay attention to your work, and have a lot of patience.