
Your Cart is Empty
Free Shipping On All Orders In July - No Coupon Code Necessary
Free Shipping On All Orders In July - No Coupon Code Necessary

You love fashion design, so it is expected to want to make garments from your own patterns. Although there are various patterns on the market, you probably want to have something unique, created from your imagination. Besides, when you get commercial patterns, one of the disadvantages is that they usually have standardized fits, and this requires you to make too many adjustments to them. So the best choice is to make your own pattern.
There are plenty of advantages when you create your own patterns. It saves you money and it also gives you an incredibly wonderful feeling. Besides, since you get the skills it takes to design your own patterns, are there any reasons for you not to do it? Well, we see no reason, so put your creativity to work and start doing it.
In this article, we’ll teach you how to make a custom pattern for a dress. You don’t need to worry about your level in fashion design, as this pattern is relatively simple to make. Also, as you’ll soon discover, this tutorial includes some of the skills that are necessary for drafting a pattern, regardless of the type of garment that you want to create.
We suppose that already know the basic construction techniques and methods, such as fitting, basting a muslin and putting a zipper. However, you’ll learn a bit of them in this tutorial, too.

Things you need
As usually, prior to going on with the process, we need to set the list of requirements with the items you need to complete this project.
 No matter what kind of dress formyou have, it can be one that you bought or one that you created your own. If you don’t have one yet, it is now about the right time for you to buy one, or do DIY. You can find some really nice and quality dress formshere, or you can learn how to do it yourself here.
Your best choice: Female Professional Dress Form with Non-Collapsible Shoulders
The process
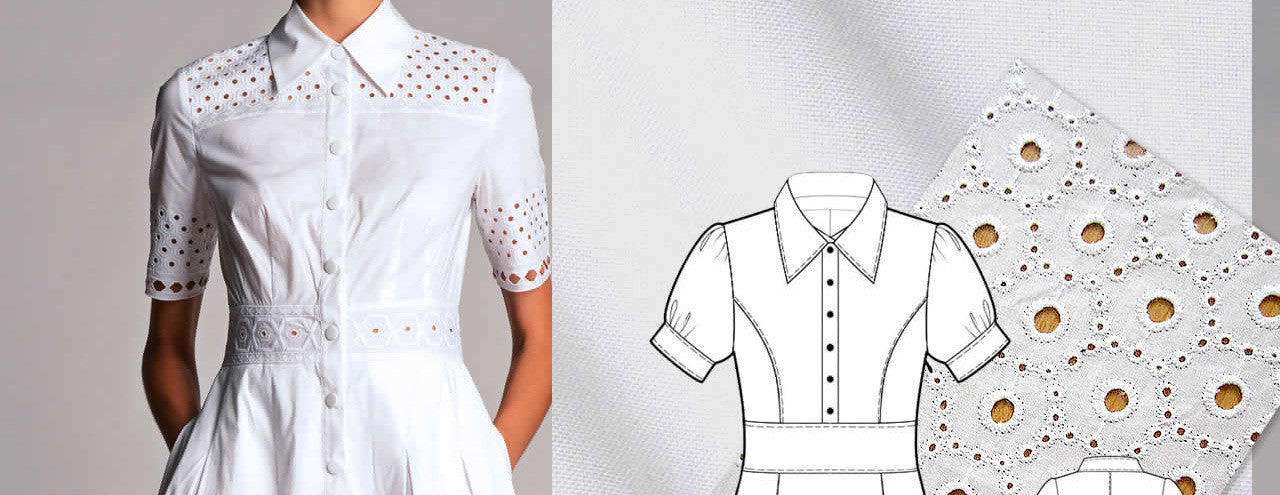
We suppose you already gathered all the items on the list. So now it is time for you to begin the actual process of designing your custom pattern for the dress. First, you start by sketching the dress you have in your mind. It is recommended to start with a general idea of the line and length that you want for your dress. This includes the type of the skirt – A-line or slim-fitting? –, the type of sleeves – sleeves or sleeveless? –, the type of the neckline.
Once you finished the first sketch, start refining it gradually, until you have reflected every design element. During this refining, you will define the dart and placement of the zipper, the type of sleeve you want to make and other such elements. You need to acknowledge that this sketch will be your blueprint.

Now that you finished doing your sketch, pin your bias tape to the dress form. Use the tape until you’re satisfied with the way it represents your design on the sketch.
Take a large piece of the muslin and pin it to the dress form. Remember to have it lie on grain. Start by pinning the midpoint front, then right down the center of the cloth. Once you finish doing this, pull the muslin to the point when it lays easily over the dress form. Pin it along the bias tape’s line. When you work on the front, it is enough to work on one side. This is because once you finish the process, all you need to do is double the muslin and assign all the pattern markings to the other side, too.
Pin the muslin to the form around where the arm hole will lie. Continue by pinching out the richness in the fabric, while making sure you even the surrounding muslin, and pin into place the front dart. Cut out the muslin, leaving about 2”-3” around the armholes and the neck. Slash to determine the muslin to sit easily around the dress form.
Now that you pinned the front and smoothed it until you’re satisfied with the result, it is time to move to the back. Repeat the process, starting with a big piece of muslin that you pin to the dress formon the fabric grain and pin it onto the bias tape’s lines. When you’re satisfied with the way it looks, cut and slash it.
To continue, you need to cut out two large semi-circles of muslin and then pin them onto the dress form’s shoulders. You need them for drafting the sleeves.
Now that you finished with pinning and smoothing every muslin pattern piece, it is the time to go on with the process. Transfer style tape’s lines to the muslin. For this, you’ll use the pencil. All you need to do is actually connect the pin heads with the pencil. Mark the dart by drawing a sequence of slashes over the dart’s top. Unpinning the muslin from your dress form and untucking the dart reveals a negative area between the slash marks. This reveals the position and depth of the dart.
Unpin the pattern pieces of muslin and tidy up the pencil lines. For the straight parts, you’ll use the ruler. Fold the front piece of the pattern on the center-front line to clone it, and assign the markings. Check for symmetry, using the ruler.
Trim pattern pieces of your draft to at least 1” seam allowance. Using your machine, baste the muslin pattern together and try it on to check the size. For the back, you can take some snap-shots in the mirror, to check the fit. Make sure that the fabric isn’t pulling strangely across your body, nor does it hang loose. In case any of these happens, you need to adjust the muslin. If you consider it necessary, seam-rip and re-baste the seams. Make any necessary adjustments.
Since most garment hangs from the shoulders, it is essential to make any necessary changes, even though it may be a tedious process. Once you made any needed corrections to the shoulders, check the side seams. They need to go straight down your garment’s sides. Continue by making pencil markings for things including the edges of the cap sleeves and the end point of the back zipper.
Take the muslin off the dress formand cut it along the seam lines. Now the muslin is the pattern. At this point, you should already have the all the markings for dart, zipper and sleeve placement. It should fit well and be marked with grain lines, and the names of each pattern piece.
In the end
You just finished your custom drafted pattern. Now it is time to move on and the next step is iron it. Go on with the cutting and sewing of your actual dress. Remember to press frequently and try on for fit.
And when you have this all done, you are finished with your custom-made dress. You can now enjoy wearing it!